
CUCKOO
User Manual
CBT-I1030RW / CBT-IS1131REW / CBT-IS1131RRW
CBT-I1030RW / CBT-IS1131REW / CBT-IS1131RRW User Manual
Thank you for purchasing your CUCKOO Electronic Toilet Seat! This manual will detail operational instructions as well as any troubleshooting should any issues arise.
Product Benefits
- Strong bidet
It is a bidet made to be used for a long period without minor malfunctions. - Everyday waterproof (IPX5 grade) structure
The product can be used safely and cleanly thanks to the IPX5-grade structure. - Convenience in cleaning
Bidet installation and separation can be done using the one-touch method, which adds convenience to cleaning. - Bidet in consideration of children(CBT-I1030RW)
It is a bidet that children can use safely thanks to a button exclusively usable by them. - Extended nozzle length
The length of the nozzle is increased to broaden the range of nozzle position selection by body shape. - Bidet that saves electricity bills
ECO function helps you save electricity bills. - Stainless nozzle
It is sanitary as stainless is applied to the nozzle, which reduces the amount of pollutants stained on it. - Remote control
A detachable remote control enables anyone to use the bidet easily and conveniently. - Deodorize function(CBT-IS1131REW, CBT-IS1131RRW)
It eliminates unpleasant odors of a bathroom for comfortable use.
IMPORTANT SAFEGUARDS
READ ALL INSTRUCTIONS BEFORE USING
DANGER : To reduce the risk of electric shock :
- Do not place or store this appliance in a location where it can fall or be pulled into a tub or sink.
- Do not place in, or drop into water or other liquids.
- Do not touch a product that has fallen into water. Unplug immediately.
WARNING : To reduce the risk of burns, electric shock, fire or injury.
- Close supervision is necessary when this appliance is used by or is near infants, elders, or handicapped persons. Children should not be permitted to use or touch this appliance without adult supervision. Be sure to adjust the toilet seat's temperature for elders, handicapped persons, or people with sensitive skin.
- Use this appliance only for its intended purpose as described in this manual. Do not use attachments not recommended by the manufacturer.
- Do not operate this appliance if the cord is damaged or if the product is dropped into water.
- Install the unit properly by following the installation procedure.
- Only authorized persons can install or repair the unit. Do not attempt to service this appliance by yourself. Doing so could void the warranty.
- Keep the cord away from heated surfaces.
- Never drop or insert any objects into any opening or hose.
- Do not use outdoors. Do not use aerosol or oxygen spray products on the unit.
- Always follow the grounding instructions in this manual before plugging in the unit.
SAVE THESE INSTRUCTIONS
CAUTIONS BEFORE INSTALLATION
NOTE THE FOLLOWING IMPORTANT POINTS
- Do not install in a location where water might be splashed on this appliance or in a location exposed to excessive moisture where condensation might form on the product's surface.
- To avoid damage to electronic components due to high levels or humidity, provide adequate ventilation by opening a window and/or door when bathing.
- Water supply should have a water pressure of 0.11MPa to 0.68MPa.
- Connect the product to a pipe carrying potable water. Do not connect to an industrial water line or other water supplies that are not potable.
- Cool the unit in the room before installation.
- The thermal protector in the water tank may malfunction when transporting or storing warm water.
- The rated power voltage is 120V AC, 60Hz.
- Do not plug the unit in until installation is complete. It may result in malfunction.
WIRING REQUIREMENTS
- Any other servicing should be performed by authorized service representatives.
- GROUNDING INSTRUCTIONS
- This product should be grounded. In the event of an electrical short circuit, grounding reduces the risk of electric shock by providing an escape wire for the electric current. This product is equipped with a cord having a grounding wire with a grounding plug. The plug must be plugged into an outlet that is properly installed and grounded.
- DANGER: Improper use of the grounding plug can result in a risk of electric shock.
- If the cord or plug is necessary to repair or needs to be replaced, do not connect the grounding wire to a flat blade terminal. The grounding wire can be identified by its insulated outer surface. It will either be colored green or will not contain yellow stripes.
- Check with a qualified electrician or serviceman if you do not understand grounding instructions or if you do not know whether the product is properly grounded.
- This product is for use on a nominal 120V circuit. It has a grounding plug that looks like the plug illustrated in sketch A.
- A temporary adapter, which looks like the adapter illustrated in sketches B and C, may be used to connect this plug to a 2-pole receptacle as shown in sketch B if a properly grounded outlet is not available. The temporary adapter should be used only until the properly grounded outlet (sketch A) can be installed by a qualified electrician The green colored rigid ear lug and the like extending from the adapter must be connected to a permanent ground such as a properly grounded outlet box cover.
- Whenever the adapter is used, it must be held in place by the screw.
- If it is necessary to use an extension cord, use only a three wire extension cord that has a three-blade grounding plug, and a three-slot receptacle that will accept the plug on the product. Replace or repair a damaged cord.
CAUTIONS FOR SAFE USE
- Please comply with the 'Warnings for Safe Use' to ensure safe and proper use of the product and prevent accidents and dangerous situations.
- The 'Warnings for Safe Use' section consists of 'Warning' and 'Caution' items, which are defined as follows:
| Symbol/Label | Description |
|---|---|
| Warning | Potentially dangerous situation that can cause serious injuries or death if not avoided. |
| Caution | Potentially dangerous situation that can cause minor injuries if not avoided. |
| Triangle Exclamation Icon | This symbol indicates a potentially dangerous situation under special circumstances that requires your attention. Please read the details carefully and follow the instructions to avoid dangerous situations. |
| Prohibited | This symbol indicates to 'prohibit' a certain action. |
| Instructions | This symbol indicates to 'instruct' a certain action. |
WarningProhibited
Do not use cleaning agents on the exterior of the Electronic Toilet Seat
- When cleaning the product, do not use or spray a cleaning agent (acidulant for a gas stove, toilet cleaning agent for sink, a variety of stain removers) or an air freshener for deodorizing onto the exterior of the Electronic Toilet Seat.
- If you use any of the above-mentioned cleaning agents or air refreshener, the exterior of the product may be discolored or damaged, causing a problem in safety of electricity.
WarningProhibited
When putting in or pulling out the Power Plug, remove moisture from hands first
- When putting in or pulling out the Power Plug, first remove moisture on your hands and then put in or pull out the Power Plug by holding the Power Plug.
- If you do not do so, it may cause an electric shock.
WarningProhibited
Never supply power to the product which is not installed on a toilet and to which no water supply hose is connected.
- It may cause a fire or malfunction.
WarningProhibited
Use a dedicated 120V Power Outlet with at least 15A rating and proper grounding; do not plug multiple devices simultaneously
- Please use the product only with a Power Outlet exclusively for 120V with at least a rating of 15A and when properly grounded. Do not plug multiple devices into the same Power Outlet simultaneously.
- If you use it with a lot of products, it may cause a fire or an electric shock.
- Please check the power outlet regularly.
- If it is not properly grounded, it may cause electric shock due to short circuit.
- If there is a foreign substance or moisture on the Power Plug, wipe it thoroughly before use.
WarningProhibited
Do not bend, tie or pull the Power Cord by force.
- It may cause an electric shock or fire.
WarningProhibited
This Product is not intended for use by people who lack physical or mental abilities, or lack experience and knowledge to use the product safely without supervision or instruction.
- This Product is not intended for use by people (including children) who lack physical or mental abilities, or lack experience and knowledge to be able to use the product safely without supervision or instruction.
- Do not let children play with the device.
- It may cause electric shock or injury.
WarningProhibited
Use the waterworks for the water supply. Do not connect an industrial water supply or a heavy water supply other than the waterworks to the product.
- It may cause a skin infection, skin disease, or bladder infection, and it may cause a malfunction.
WarningProhibited
Do not block the hot air hole or put foreign substances such as your hand or a metal stick into the product.
- It may cause burns or electric shock.
- It may cause a malfunction of the product.
WarningProhibited
Beware of low-temperature burns.
- If your skin comes in contact with the product for a long time even at a relatively low temperature, your skin may get low-temperature burns.
- Children, the elderly and the infirm, and those with disabilities in physical activities should use the product at low toilet seat temperatures, hot water temperatures, and dry temperatures.
- After using the product at a high temperature, please lower the temperature for those users who are the elderly and the infirm, children, and those with weak skin.
WarningProhibited
If you use the product for a long time on the toilet seat or the hot air dry mode, you may get a low-temperature burn.
- Particularly pay attention to the temperature when children, those who cannot control the temperature on their own, or those with weak skin use the product.
WarningsProhibited
Do not disassemble, repair, or remodel the product, and prevent foreign substances from entering into the product.
- It may cause a malfunction of the product.
- It may cause a fire, electric shock, or bodily injury.
- Please contact our Customer Service Center for repair of the product.
WarningsProhibited
Stop using the product if the Power Cord or the Power Plug is damaged or is shaking, and contact our Customer Service Center.
- If the sheath of the Power Cord is peeled off or chopped during use due to negligence, it may cause fire or electric shock. Thus, please check the status of the Power Cord, Power Plug, and Power Outlet frequently.
- To prevent dangerous situations arising from the damage of the Power Cord or the Power Plug, please contact the manufacturer, distributor or certified technician (servicemen) for replacement.
- We strongly recommend that the damaged parts be repaired at a designated service center.
WarningsProhibited
Do not put cigarettes or burning materials near the product or put such materials onto the product.
- It may cause a fire or malfunction of the product.
WarningsProhibited
When disassembling the product from the toilet, always first pull out the Power Plug from the Power Outlet for safety.
- It may cause an electric shock or fire.
WarningsProhibited
Do not sprinkle water onto the Main Frame of the product or the Power Plug or use the product in a humid place.
- It may cause a fire due to a short circuit. It may cause a malfunction, and you may not receive a service free of charge.
WarningsProhibited
Do not put inflammables such as a stove for heating the bathroom heater, or cigarettes near the product.
- It may cause a fire, discoloration, or malfunction.
WarningsProhibited
Do not randomly connect or process the Power Cord.
- It may cause an electric shock or fire.
WarningsProhibited
Do not insert power plugs of several products in a single outlet at the same time.
- If you put power plugs of various products such as a ventilator in the bathroom or other electric products in a single power outlet, it may cause heat generation, ignition, or fire.
WarningsProhibited
When taking a shower or cleaning the bathroom with water, always pull out the Power Plug, and prevent water or detergent or the like from being put on the Main Frame of the product or the Power Plug.
- It may cause an electric shock or fire.
- When water or other foreign substances are put into the product, pull out the Power Plug, close the water supply valve, and then contact our Customer Service Center.
WarningsProhibited
Do not pull or bend the Connection Pipe Hose using excessive force.
- It may cause a water leak or suspension of water supply.
CautionProhibited
If a strange noise, smell, or smoke comes out from the product during use, immediately pull out the Power Plug, and contact our Customer Service Center.
- If you continue to use the product with such malfunction, it may cause a fire or electric shock.
CautionProhibited
Do not step on the toilet seat or the toilet seat cover to go up or put anything on the toilet seat or the toilet seat cover. In particular, do not sit on the toilet seat cover.
- Do not put your hand on or step on the toilet seat cover, toilet seat, or the Main Frame to go up.
- It may cause damage or malfunction of the product.
- It may cause a bodily injury due to deformation or damage.
CautionProhibited
Do not use the product for any other usage described in the User Manual.
- It may cause a fire, electric shock, or bodily injury.
CautionProhibited
Prevent children from putting any foreign substances or their hand into the nozzle or the hot air outlet.
- It may cause burns.
- It may cause a fire or electric shock.
- It may cause a malfunction of the product.
CautionProhibited
Install the product by avoiding the direct sunlight.
- It may cause a discoloration on the exterior of the product or a malfunction of the product.
CautionProhibited
Never soak the product in water.
- It may cause a malfunction, electric shock, or fire.
CautionProhibited
When there is dust on the Power Plug, wipe it off with a dry cloth.
CautionProhibited
Children may fall into the toilet through the toilet seat, so adults should accompany children to use the product.
- If you do not do so, it may cause a bodily injury.
CautionProhibited
Do not forcibly close the toilet seat or the toilet seat cover.
- It may cause malfunction.
CautionProhibited
Do not excessively lean on the toilet seat cover.
- It may cause malfunction.
- It may cause a bodily injury due to deformation or damage.
CautionProhibited
Do not press any button on the Control Panel after putting the toilet seat on the toilet by your hand or other things without sitting on the toilet seat.
- Water may come out from the nozzle, so your clothes may get wet. In addition, you may get a bodily injury or burns by hot water or hot air.
CautionProhibited
If you are going to not use the product for a long time or to clean the product, first pull out the Power Plug.
- If you do not do so, it may cause a fire.
CautionProhibited
After installing the product, always check if any water leaks from the Water Supply Connection Unit.
- It may cause a fire or electric shock due to water leak.
CautionProhibited
In a region with concern over freezing, please provide heating, and prevent the surrounding temperature from going down to below zero.
- If the product is frozen, the pipes such as the water supply pipe may be damaged, and water leakage may be caused. If there is concern over freezing, please take the water out from the product.
CautionProhibited
When cleaning the waterworks filter of the Main Frame of the Electronic Toilet Seat, first close the Water Supply Valve, and disassemble the Water Supply Hose for the Electronic Toilet Seat. After cleaning, when you try to re-assemble the product, close it firmly to leave no gap.
- It may cause a water leak.
CautionProhibited
Prevent urine from being spilled on the hot air outlet and the nozzle parts.
- It may cause odor or malfunction of the product.
- When a nozzle is blocked by foreign substances such as urine, wipe it off with a soft toothbrush which you do not use.
CautionProhibited
Never connect the product to a hot water pipe.
- It may cause a malfunction of the product or a bodily injury. Always connect the product to the cold water pipe.
CautionProhibited
Do not use the product with any disorder. In the following cases, pull out the Power Plug, and close the Water Supply Valve.
- Water leaks from the pipe or the Main Frame.
- There is a strange noise or odor.
- There is a crack or broken part on the Main Frame.
- There is smoke coming out from the Main Frame.
- If you continue to use the product with any disorder, it may cause a fire, electric shock, or water leak.
- Please contact our Customer Service Center for repair of the product.
PARTS & ACCESSORIES
Main Frame

- 1 Seat Cover
- 2 Control Panel
- 3 Seating Sensor
- 4 Bidet Nozzle
- 5 Warm Air Outlet
- 6 Heated Seat
Accessories
| Materials to fix product | Installation materials (CBT-IS1131REW, CBT-IS1131RRW) | Materials for piping | Others |
|---|---|---|---|
| Fixing bolts (2) Fixing washer (2) Fixing brackets (2) Rubber nut (2) Main frame fixing plate (1) | Waterworks filter Adapter | Branched T-valve (1) | User manual (1) Remote control Mount AA batteries (2) |
BEFORE INSTALLATION
Details to Check before Installation
⚠ Precautions for Place of Installation
- Avoid direct sunlight and electric heating appliances.
- Avoid contact with direct sunlight and electric heating appliances as they may cause fire, damage, or discoloration of the unit.
- Check the size of your toilet.
- 1) At least 490 mm of length of the toilet and at least 490 mm of length from the front of the water tank to the front end of the toilet are required.
- 2) At least 140-200 mm of the distance between the centers of the product fixing holes in front of the toilet water tank is required.
- This product may not be compatible with imported toilets due to ill-fitting sizes.
- Do not install where the product may be exposed to moisture, excessive dust, or splashing water as this may cause the product to malfunction.
- It may cause a malfunction of the product.
- Avoid installing in areas where the temperature will drop to freezing temperatures.
- The product is intended to be used indoors. Installing it in a place where the temperature goes down below 0 °C may lead to a malfunction of the product due to frozen filters or inside of the product.
- The product may not be able to be installed if the water supply valve is a flush valve. Check the valve status before installation.
⚠ Precautions for Moving the Product
Always use caution when moving the product.
- Never place the product upside down.
- Always remove the power plug before attempting to move the product.
⚠ Precautions for Connecting Pipes
Ensure the water supply valve is connected to the cold water pipe.
- Connecting the product to the hot water pipe may cause burns or a product malfunction.
HOW TO INSTALL
Installation Order (CBT-I1030RW)
Warnings
- Use only with a properly grounded 120V AC power outlet with a rating of at least 15A.
- Do not plug in the power cord before and while installing.
- Separate water supply hose
- Turn the water supply valve clockwise to lock, then separate the toilet hose using a spanner.
- Remove the existing toilet seat
- Unfasten the nut and remove the toilet seat.
- Set the old toilet lid and nuts aside for future re-installation.
- Connect T-valve
- Install the T-valve as shown in the image.
- Install the body.
- Place the main frame fixing plate on the toilet and affix the fixing bolts on the main frame fixing plate as shown in the image.
- The location at which the Main Frame Fixing Plate is secured determines the location where the product is installed. Considering the size of the product and toilet, fix the Main Frame Fixing Plate in a suitable position. If the position of Main Frame Fixing Plate is improper, the seat will not be properly positioned in relation to the toilet.
- Connect the flexible hose
- Connect the flexible hose to the T-valve and the main body.
- Turn the water supply valve counterclockwise to allow water flow.
Order of installation (CBT-IS1131REW, CBT-IS1131RRW)
Warnings
- Use only with a properly grounded 120V AC power outlet with a rating of at least 15A.
- Do not plug in the power cord before and while installing.
- Separate the original seat from the toilet.
- Unfasten the fixing nuts (2) on left and right sides and then separate the original seat and the seat cover.
- Store the detached original seat, seat cover and fixing nuts in a secure place in case of moving or re-installation in the future.
- Caution: Before installing the bidet, check the size of the toilet (porcelain).
- Turn the water supply valve clockwise to lock it and then separate the water supply hose on the toilet side connected to the water supply valve.
- Install a T-valve from where the water supply hose has been separated.
- Install the main frame of the bidet.
- As shown in the image, place the Main Frame Fixing Plate on the toilet and affix the fixing bolts on the Main Frame Fixing Plate to fix it onto the toilet.
- At this time, secure it firmly by using a tool, etc. so that the Main Frame Fixing Plate does not shake.
- The location at which the Main Frame Fixing Plate is secured determines the location where the product is installed. Considering the size of the product and toilet, fix the Main Frame Fixing Plate in a suitable position.
- If the position of Main Frame Fixing Plate is improper, the seat will be too forward or backward compared to the toilet.
- Caution: When attaching and fixing the main frame, fix it carefully so that the centers of the main frame and toilet are aligned.
- Connect the hose for the bidet to the bidet's water supply inlet.
- Connect the branched T-valve, waterworks filter and water supply hose for the bidet.
- ※ Refer to below for installation of a waterworks filter.
How to Install the Filter
Video Tutorial
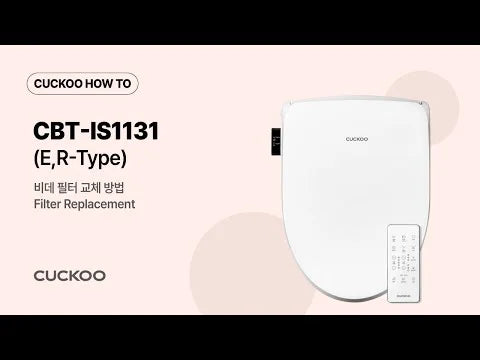
- Connect the filter to the adapter.
- ※ (Hold the adapter in place when connecting to the filter)
- ※ Check the rubber sealing when connecting the filter
- ※ After connecting the filter to the adapter, twist to close. Twist another ¼ of a full rotation after the filter becomes difficult to twist.
- (Leaks may occur if the filter has not been connected properly.)
- Check for leaks (hose connection/filter connection).
- Water pressure may be affected if the filter is filled with contaminants or if the filter is used past its lifespan. In this case, please change the filter.
How to Install the Remote Control
Precautions for Installing the Remote Control
- Avoid direct sunlight during installation.
- If a fluorescent light is in the proximity of the remote control or the remote control reception panel on the main frame, be careful as transmission of signals may be interfered with due to the light.
- Install the remote control in a location where the product is able to be operated as soon as you press the buttons (where the signals from the remote control can be received).
- Determine the location on the wall where the mount is to be attached and wipe the area cleanly to remove any water or residue.
- Install in a location that is easily reachable when sat on the toilet seat and where water is not splashed.
- Remove the protective cover of the adhesive sticker on the back of the mount and firmly press it on a wall in the correct orientation.
- Ensure the mount is securely attached to the wall, then place the remote control inside.
- Install the mount in a position that allows the remote control to be inserted from top to bottom.
How to Replace Remote Control Batteries
Warnings
- If the remote control appears to have its signal weakened during operation, this signifies the batteries need to be replaced soon.
- The remote control requires two AA batteries. Always ensure they are placed correctly inside the remote.
- Do not use a new battery together with an old battery.
- Remove the remote control from the mount.
- Lift the battery cover on the back of the remote control in the direction of the arrow to open it.
- Take out existing batteries and insert new batteries according to the direction marked.
- Replace the battery cover to the back of the remote control.
- To check if the batteries have been successfully replaced, press the CLEAN button. Press the STOP button once the LED screen on the remote illuminates.
- Reinsert the remote control into the mount.
Warnings
Check List for Installation
- When operating a remote control while two or more products are installed at a close distance to each other, multiple products may be activated simultaneously.
- In such cases, it is possible to configure the code of each product and its remote control so that a single remote control can activate a single product only.
- If you wish to apply this setting, please contact our Customer Service Center.
AFTER INSTALLATION
Sequence of Installation
- Remove the packing sticker from the Bidet Nozzle.
- ※ You need to first remove the nozzle packing sticker from the center of the Main Frame of the Electronic Toilet Seat to normally operate the product.
- Open the Water Supply Valve by turning it to the left, and check if water leaks from the connection parts.
- Check if the T-Valve and the Main Frame Water Supply Hose are fastened in a straight line.
- ※ Warnings
- All parts throughout the manual need to be formatted the same--either Sentence Case or all lowercase
- Plug in the power cord to an available power outlet.
- If the power supply lamp is not turned on after plugging in the power cord, press any button on the control panel found on the main frame.
- ※ Warnings
- When power is supplied to the main frame, do not turn or move the main frame as this may cause product malfunction.
- With your right hand in contact with the Seating Sensor Unit (with the Seating Sensor Unit operating), press the Clean or the Bidet button to check if the Nozzle works and water is sprayed. Here, Cover the clean nozzle with your left hand to prevent water from splashing.
BEFORE USE
Checklist before Use
- Please turn the power ON.
- Plug the power cord into an available 120V AC outlet.
- Replace the waterworks filter et on a regular basis. (CBT-IS1131REW, CBT-IS1131RRW)
- If the filter is blocked by foreign substances or the water penetration rate is reduced as it nears the replacement period, water supply into the product may not be active.
- Always sit on the center of the toilet seat. Never perch on the outer edge.
- If you move your buttocks or cross your legs while using the product, the product may stop operation.
- If you install an auxiliary seat for infants on the Electronic Toilet Seat, the product will not work. (The Skin Sensor will fail to detect.)
- Ensure the water pressure is appropriate for use.
- If you use the Electronic Toilet Seat at the same time as you flush the toilet after relieving yourself, the water pressure may decrease.
- If your region has a low water pressure, the Electronic Toilet Seat may not work. (If the water pressure is 0.04 MPa (0.4Kgf/cm²) or lower, the Electronic Toilet Seat may not work.)
EXPLANATION OF FUNCTIONS OF CONTROL PANEL
Warnings
Always unplug the power cord before attempting to clean the bidet. While cleaning, use a slightly damp cloth to wipe down. Do not use a dishwashing sponge, benzene, thinner or any other harmful substances that could cause damage to the product.
Control panel

FUNCTIONS
| Icon/Label | Description |
|---|---|
| REAR • MOVE •• | Used when cleaning the anus |
| FRONT • MOVE •• | Cleaning for women |
| TURBO • MOVE •• | Turbo water streams massage the anus to induce active and satisfying bowel movements. |
| DYNAMIC • POWER REAR •• (CBT-IS1131REW, CBT-IS1131RRW) | DYNAMIC • This mode uses varied water pressure and an effective sequence of settings to ensure a deep clean. POWER REAR • This mode is more powerful than the default rinse mode. |
| DRYER | Initiates hot air drying |
| • Automatically shuts off after 3 minute | |
| ※ Dries quicker if you wipe off the waterdrops with a tissue, etc. before drying. | |
| CHILD (CBT-I1030RW) | Emits soft water streams to automatically proceed from cleaning to drying |
| • Automatically stops after 1 minute of cleaning and 3 minutes of drying | |
| PRESS. LVL DRYER TEMP. (+) (−) | Adjusts the water pressure and hot air temperature from Level 1 to Level 5 |
| NOZZLE POSITION (up/down arrows) | Adjusts the nozzle's position from front to rear |
| WATER TEMP. | Adjusts the water temperature from Level 0 to Level 3 |
| SEAT TEMP. | Adjusts the seat temperature from Level 0 to Level 3 |
| AUTO • MANUAL − NOZZLE CLEANING | ※ Cleans the nozzle |
| ※ To move the nozzle back and forth for automatic cleaning, press the button briefly | |
| ※ To move the nozzle all the way forward for 2 minutes, press and hold the button | |
| LIGHT (CBT-I1030RW) | Turns the mood lamp on when pressed once. Turns off the mood lamp with a second press. (differentiated by sound) |
| DEODORIZER | If the Deodorize button is pressed during use, the deodorization function is activated. Press while the bidet is in use to deodorize. Press once more to cease deodorization. (The Deodorize function can be used selectively.) (A deodorization filter is installed inside the main frame.) ※ The Deodorize function is used to eliminate bathroom odors. (CBT-IS1131REW, CBT-IS1131RRW) |
| ECO / ECO LIGHT(3sec) | Press the button once to turn ON/OFF the Power Save function. The ECO function can be used by pressing the button briefly. |
| ※ Press and hold the button for 3 seconds to use the mood lamp function. If you press and hold the button for 3 seconds once more, the mood lamp function is canceled.(CBT-IS1131REW, CBT-IS1131RRW) |
- Always sit in the center of the toilet seat. Never perch or sit on the edge of the seat as the seating sensor will not be activated properly.
- If the water entry temperature is 15°C or lower, the temperature of the cleaning water may become lower than the set temperature (other operations work normally).
- If the water pressure is strong (especially while using TURBO or POWER CLEAN function), the temperature of the cleaning water may become lower than the set temperature. In such cases, adjust the water pressure level to 3 or below for use.
If you stay seated on the seat or use the product in the hot air dry mode for a long time, you may get a low-temperature burn.
- When used by the following persons, please set the SEAT TEMP. button to "OFF" or "Level 2" for use. When used by children, senior citizens, those with vulnerable skin, those who are unable to control their own body temperatures, those who have taken sleep-inducing drugs (sleeping pills or cold medicine), those who are hungover or fatigued, it may cause a low-temperature burn or an accident.
HOW TO USE
Basic method of use
- Sit on the seat.
- Sit in the center of the toilet seat to activate the sensor.
- Press the button.
- Press the desired button to initiate the cleaning function.
- If the button that was pressed during use is pressed one more time, MOVE CLEAN can be used.
- Press the button. (DRYER)
- Press the DRYER button to begin drying.
- The bidet will carry out the function for 3 minutes before automatically shutting off.
- Press the STOP button.
- The initiated function will stop.
The seating sensor of this product is installed inside the seat. It activates as soon as your skin comes in contact with the seat at the location of the seating sensor. If a cover, etc. is applied over the surface of the seat, the skin will not touch the seat, which may not activate the seating sensor.
SIMPLE CONTROL PANEL ON THE MAIN FRAME
- The simple control panel can activate basic functions (CLEAN/STOP) in the case that the remote control is lost, broken, or the batteries have been depleted.
- Due to its limited functions, the temperature control and water pressure cannot be adjusted using the simple control panel.
- Sit on the seat.
- Sit on the center of the toilet seat.
- Press the CLEAN button.
- CLEAN function can be used.
- After cleaning, the bidet will automatically begin the DRYER function for 3 minutes then shut off.
- If the button that was pressed during CLEAN is pressed one more time, MOVE CLEAN can be used.
- Press the STOP button.
- CLEAN or DRYER operation stops.
HOW TO USE EACH FUNCTION
MOVE CLEAN
- If the button is pressed one more time while CLEAN, BIDET or TURBO is in use, the nozzle moves back and forth to perform MOVE CLEAN.
- If the button is pressed one more time during MOVE CLEAN, the nozzle stops.
WATER PRESSURE CONTROL
- You may change the strength of the water stream from Level 1 to 5 by pressing the PRESS. LVL/DRYER TEMP. button.
- If foreign substances become stuck on the waterworks filter, the water pressure may become weak. If the water pressure continues to weaken, the filter needs to be replaced.
- The default water pressure level is Level 3.
NOZZLE POSITION CONTROL
- You can change the nozzle position by pressing the NOZZLE POSITION button.
- The display lamp preferentially shows the water pressure level at all times.
- When the NOZZLE POSITION button is pressed, the position of the nozzle is displayed.
DRYER TEMPERATURE CONTROL
- You may change the drying temperature from Level 1 to 5 by pressing the PRESS. LVL/DRYER TEMP. button while the DRYER function is in use.
- The default drying temperature level is Level 3.
HOT WATER TEMPERATURE CONTROL
- You may change the hot water temperature from Level 0 (OFF) to the three levels (Low, Medium, High) by pressing the "WATER TEMP." button.
- The default hot water temperature level is set to OFF. After the hot temperature has been set once, the chosen level will then be automatically set as the default temperature.
SEAT TEMPERATURE CONTROL
- You may change the seat temperature from Level 0 (OFF) to the three levels (Low, Medium, High) by pressing the "SEAT TEMP." button.
- The default seat temperature level is set to OFF. After the seat temperature has been set once, the chosen level will then be automatically set as the default temperature.
HOW TO CONTROL AND USE EACH FUNCTION
CHILD (CBT-I1030RW)
- This is a convenient function for children.
- It emits softer water streams than typical cleaning and is activated for 1 minute during which it executes automatic water pressure control and MOVE function.
- Once cleaning is complete, it automatically starts drying and stops it after 3 minutes.
ECO
- The ECO function can be used by pressing the "ECO" button briefly.
- The initial setting is in OFF and you can check whether or not the ECO function is activated through the display lamp.
- If you press the button briefly one more time, the ECO function is deactivated.
In the ECO mode, the hot water and seat temperatures are maintained lower than the set temperature so, when using the ECO mode in wintertime, the water and seat may be cold at first.
Other power-saving measures
To save power, the following are recommended.
- Keep the seat cover closed. If the seat cover is closed after use, less heat is generated from the surface of the seat to save power.
- Set a low temperature. It saves power if the temperature is set as low depending on the season and to the extent that you do not feel cold.
- Keep the power cord unplugged. When you go out or do not plan to use the product for a long period, unplugging the power plug saves power.
SELF-CLEANING
- Before every use of cleaning, the nozzle comes out and cleaning water is emitted to clean the nozzle.
- After every use of cleaning, the nozzle goes in and cleaning water is emitted to clean the nozzle.
NOZZLE CLEANING
(1) Automatic function
- While you are not seated on the seat, press the ""NOZZLE CLEANING"" button briefly to use the automatic function.
- In the automatic function, the nozzle automatically moves for automatic cleaning of the nozzle.
(2) Manual function
- While you are not seated on the seat, press and hold the "NOZZLE CLEANING" button to use the manual function.
- When the manual function is activated, the nozzle comes out.
- Once the "STOP" button is pressed or 2 minutes pass by, the nozzle goes in for self-cleaning.
Pushing the nozzle in by force without pressing the STOP button may damage the nozzle.
HOW TO CLEAN
Cleaning Precautions
- Use of a sharp brush or a coarse dishwashing sponge for cleaning may cause scratches and/or damage to the product.
- Do not use sharp brushes or coarse dishwashing sponges to clean the bidet in order to prevent scratches or damage to the product.
- Refrain from spraying water on the nozzle and hot air inlet as this may cause electrical shock or product malfunction.
- Do not use a dishwashing sponge, benzene, thinner or other harmful detergents when cleaning the control panel. Always ensure the power plug is removed from the outlet before attempting to clean.
How to Clean the Nozzle
- Automatic nozzle cleaning
- While you are not seated on the seat, press the "NOZZLE CLEANING" button briefly.
- The nozzle automatically moves back and forth for automatic cleaning.
- The nozzle will automatically move back and forth for automatic cleaning
- While you are not seated on the seat, press and hold the "NOZZLE CLEANING" button for 3 seconds.
- The manual function will be activated to protrude the nozzle.
- Clean the nozzle with a toothbrush, etc. you do not use.
- Once the STOP button is pressed or 2 minutes elapses, the nozzle goes in for self-cleaning.
Pushing the nozzle in by force without pressing the STOP button may damage the nozzle.
How to Clean & Replace Nozzle Cap (CBT-I1030RW)
- (Manual nozzle cleaning) If you press and hold the "NOZZLE CLEANING" button without sitting on the seat, the nozzle moves forward and stops for 2 minutes.
- At this time, take out the nozzle cap and use a toothbrush, etc. to clean both the nozzle and nozzle cap.
- The nozzle cap will be separated from the nozzle if you press both of its ends and the nozzle downward in the vertical direction and then pull the cap slightly in the horizontal direction of the nozzle.
If you pull the nozzle cap by force, the hook located on the rear of the nozzle cap may be damaged.
- After cleaning, insert the nozzle cap and press the STOP button to return the nozzle.
How to Clean the Exterior
- To prevent damage to the bidet, do not clean with a dishwashing sponge or harmful cleaning detergents. Do not use a thinner, benzene and other cleaners for bathrooms to clean the exterior of the bidet directly.
- The main frame can be cleaned with water, for instance, through a shower head during a shower or bath Ensure the power plug does not come into contact with water or liquid to avoid electrical shock.
- Always ensure the power plug has been removed from the outlet before attempting to clean.
- Touching a power outlet with wet hands may cause electric shock.
- After cleaning, use a soft cloth to remove the water.
Damage including discoloration, crack and scratch on the exterior case caused by an incorrect cleaning method will incur a paid replacement even if the warranty period has not expired yet.
How to Clean Waterworks Filter Net
- Clean the filter on a regular basis with regular use.
- Lock the water supply valve and separate the waterworks filter adater or bidet hose to clean the waterworks filter net installed in the product.
HOW TO DISASSEMBLE THE PRODUCT & STORE
How to Disassemble and Keep the Product
※ If you need to disassemble the product from the toilet because of moving to another house or cleaning, follow the following instructions.
- Remove the power plug from the outlet.
- Close the water supply valve by turning it clockwise until loose.
- Loosen the nut on the T-Valve side of the Hose for the Electronic Toilet Seat and disassemble the Main Frame of the Electronic Toilet Seat from the toilet.
- ※ How to Disassemble the Electronic Toilet Seat With your hand pressing the Lever, pull out the product forward.
- Disassemble the Hose for the Electronic Toilet Seat, the T-Valve, and the Main Frame Fixing Plate.
- Connect the Water Supply Pipe to the Water Supply Valve.
- Open the Water Supply Valve by turning it counterclockwise, and check if there is water leakage from the Water Supply Pipe Connection Unit.
- Replace the old toilet seat onto the toilet with the saved nuts.
How to Use the Electronic Toilet Seat in Winter
- Plug the power cord into an available 120V AC outlet.
- Set the SEAT TEMP. to "Low"
- If storing the bidet during winter, do not store the bidet outside and be sure to keep in a warm, dry area.
TROUBLESHOOTING
If you're running into any issues while using your bidet, refer to the below troubleshooting chart to properly assess and correct the problem. If the problem persists, contact our Customer Service Center.
| Problem | Possible Issues | Corrective Action |
|---|---|---|
| Water is not being sprayed out when the bidet is plugged in and a function is initiated | • Is the water flow shut off? | • Wait until the water flow shut-off process ends. |
| • Is the water supply valve locked? | • Open the water supply valve. | |
| • Is the waterworks filter blocked? | • Replace the waterworks filter. | |
| The bidet is not operating properly/turning on | • Is the power plug plugged into a working outlet? | • Plug the power cord into an available 120V AC outlet. |
| • Was the bidet activated while you are not sitting down on the seat? | • Sit on the center of the toilet seat to activate the seating sensor. The bidet will not function if the sensor cannot detect you. Wait to operate the bidet until the blackout ceases. | |
| • Has there been a blackout? | • Please wait until the power is recovered. | |
| There is a water leakage | • Is the pipe connection properly made? | • Refer to "Before Installation" to ensure the water supply was connected to the bidet properly. • Contact the location of purchase or our Customer Service Center. |
| The water pressure is too weak | • Are foreign substances stuck on the waterworks filter? | • Clean the waterworks filter. |
| • Is the hose of the main frame bent? | • Smooth out the bent part of the hose. | |
| • Is the water pressure display lamp set to Level 1? | • Try raising the water pressure. | |
| • Is the waterworks filter blocked? | • Contact the location of purchase or our Customer Service Center. | |
| The water temperature, the seat temperature, or air temperature are not warm enough | • Is the hot water or seat temperature set to "Low" or "OFF"? | • Set the hot water or seat temperature to either "Medium" or "High". |
| • Is the hot air temperature set to "Level 2" or below? | • Set the hot air temperature to "Level 3" or higher. | |
| • Is the water entry temperature low (below 15°C) or the water pressure set to "Level 5"? | • To maintain the temperature of hot water, set the water pressure to "Level 3" or below. | |
| • Is the ECO mode turned on? | • In the ECO mode, the temperature is maintained lower than the set temperature. Either deactivate the ECO mode or sit on the seat and wait for about 5 minutes. | |
| The main frame shakes while in use | • Are the fixing bolts that fix the main frame loose? | Re-fasten the fixing bolts of the main frame. |
| The buttons do not operate when pressed | • Is there any water on the touch control panel? | • If any water gets onto the control panel, buttons may not work so be sure to remove any water first before use. |
| • Is the display lamp of the remote control lit? | • If the batteries of the remote control are too low, the display lamp will not be lit. Please replace the batteries. |
Product Specifications
| Model name | CBT-I1030RW | CBT-IS1031REW | CBT-IS1131RRW | ||
| Seat type | ELONGATED | ROUND | |||
| Rating | 120V AC / 60Hz | ||||
| Maximum power consumption | 660W | 1,260W | |||
| Power cord | About 1.5m | ||||
| Water supply method | Direct connection water supply | ||||
| Cleaning device | Water volume | CLEAN | About 0.74L/min | About 0.7L/min | |
| BIDET | About 0.71L/min | About 0.57L/min | |||
| TURBO | About 0.76L/min | About 0.9L/min | |||
| Water pressure control | 5 levels | ||||
| Temperature control | Room temperature, Low (93.2°F / 34 °C), Medium (98.6°F / 37°C), High (104F / 40 °C) | ||||
| Heater capacity | 600W | 1,200W | |||
| Safety device | Temperature fuse, thermo switch, water level sensor | ||||
| Reverse-current prevention | Check Valve, Vacuum Valve | ||||
| Seat heating device | Temperature control | Room temperature, Low (93.2°F / 34 °C), Medium(98.6°F / 37°C), High(104F / 40 °C) | |||
| Heater capacity | 55W | ||||
| Safety device | Temperature fuse | ||||
| Hot air drying device | Temperature control | Room temperature - 131°F / 55 °C ( 5 levels) | |||
| Heater capacity | 250W | ||||
| Safety device | Temperature fuse | ||||
| Water supply pressure used | 0.1 ~ 0.74Mpa (1.0 ~ 7.5 kgf/cm²) | ||||
| Water supply temperature used | 41 - 93.2 °F (recommendation: 59 - 77 °F) / 5 - 34 °C (recommendation: 15 - 25 °C) | ||||
| Ambient temperature usage | 41 - 104 °F (recommendation: 50 - 95 °F) / 5 - 34 °C (recommendation: 15 - 25 °C) | ||||
| Product size | 16.9 x 21 x 6.4 Inch / 430.5 x 534 x 162mm | 16.9 x 19.4 x 6.4 inch / 430.5 x 493.9 x 162mm | |||
| Product weight | About 8.8 lbs / 4.0kg | ||||
※ The product design and specifications may be changed without prior notice for improving product performance.
※ The proper water pressure for use is 0.11-0.68 Mpa (1.1 bar ~ 6.8 bar).
www.cuckooamerica.com / www.cuckoorental.com
We provide satisfying Consultation and services concerning your complaints, suggestions, and recommendations upon receiving your troubled product model name, status, and contact information.
- After reading this manual, keep it in a place easily accessible to the user for future reference.
- This manual includes the warranty.
- Caution : Please read this manual carefully to ensure safety and a longer product lifespan.