
CUCKOO
User Manual
CAC-F3010FW
CAC-F3010FW User Manual
Merits of Cuckoo Air Purifier
- Air Purification: This product filters out fine dust that is airborne using an Ultra PM 2.5 filter mounted at the inlet of the product.
- Toxic Gas purification: Removes harmful gas and odors that are airborne to make sure your home is safe.
- Fan Speed Control: Set your preferred fan speed.
- Set Timer: Set a custom timer for your air purifier. Perfect for automatic On/Off function.
- Smart operation feature using fine dust sensor and TVOC sensor: This product uses the fine dust sensor and TVOC sensor to comprehensively judge the indoor air quality and automatically controls the air volume depending on the environment to set up a pleasant indoor environment.
- Mood lamp feature indicating the indoor air quality: This function indicates the indoor air quality, which has been comprehensively judged by the fine dust sensor and TVOC sensor, through a mood lamp, and raises the level of interior senses. The lamp may be turned ON and OFF by pressing the Air Quality button.
Warnings for Safe Use
Please comply with the 'Warnings for Safe Use' as they are provided to ensure safe and proper use of the device and prevent accidents and dangerous situations.
The 'Warnings for Safe Use' section is divided into 'Warning' and 'Caution' which are defined as follows.
| Symbol/Type | Description |
|---|---|
| Warning | Potentially dangerous situation that can cause serious injuries or death if not avoided. |
| Caution | Potentially dangerous situation that can cause minor injuries if not avoided. |
| Triangle Exclamation Icon | This symbol is to remind you to be cautious about a potentially dangerous situation under special circumstances. Please read the details carefully and follow the instructions to avoid dangerous situations. |
| Do not | This symbol is used to indicate actions that are prohibited. |
| Instructions | This symbol is used to indicate 'Instruction' actions. |
About Power Supply
WarningDo not
Do not bend, tie or pull the power cord by force.
- This may cause electric shock or fire due to a short circuit. Please check the state of the Power Cord frequently.
WarningDo not
Plug the power plug into a 120V outlet with at least a rating of 10A and power surge protection. Do not plug in multiple devices into the same power outlet or extension cord simultaneously.
- When multiple devices are plugged into the same power outlet or if the device is plugged into an inappropriate power input, it may cause heating, fire and electric shock.
- If there is a foreign substance or water on the power plug, please wipe it clean before plugging it into the socket.
- Use an extension cord of 10A or higher.
WarningDo not
Use 120V power input only.
- This may cause electric shock or fire.
- The device will not operate properly.
- Please check the state of the power cord and plug frequently.
WarningDo not
Wipe off any foreign substance from the Power Plug with a dry cloth.
- This may cause electric shock or fire. Please check the state of the power plug frequently.
WarningDo not
Stop the use and contact Customer Service when the power cord or plug is damaged or the power outlet is loose.
- If the sheath of the Power Cord is peeled off or chopped during use due to negligence, it may cause fire or electric shock. Thus, please check the state of the Power Cord, Power Plug and Power Outlet frequently.
- To replace the damaged power cord or plug, please visit CUCKOO website and contact Customer Service to prevent dangerous situations.
- We strongly recommend that the damaged parts be repaired or replaced.
- Otherwise, this may cause electric shock or fire due to a short circuit.
WarningDo not
When putting in or pulling out the Power Plug, first remove moisture from your hands and then put in or pull out the Power Plug by holding the Power Plug.
- Pulling out the Power Plug with wet hands can cause electric shock.
- Pulling the power cord by force can damage the cord and may cause a short circuit or electric shock. Please check the state of the power cord and plug frequently.
WarningDo not
Please unplug the device before cleaning the machine.
- Otherwise it may cause electric shock or malfunction. Please check the state of the Power Plug and the Power Cord frequently.
WarningDo not
Do not pull the Power Cord when unplugging the product.
- Force applied to the power cord may cause electric shock or fire. Please check the state of the power cord and plug frequently.
WarningDo not
Do not put the product or anything heavy on the Power Cord.
- This may cause damage to the Power Cord that could lead to fire, electric shock, or fall of the product.
WarningDo not
When moving the product, do not pull the Power Cord.
- It may cause a damage to the product, electric shock, or fire. Please check the state of the Power Cord frequently.
WarningDo not
Make sure the power cord is not under a heavy object or near sharp objects. Please ensure that it is not damaged by your pet.
- If the power cord is damaged, it may cause electric shock or fire. Please check the state of the power cord frequently.
WarningDo not
If the power supply area is wet, unplug the product and let it dry completely before use.
- This may cause electric shock or fire. Please check the state of the Power Plug and the Power Cord frequently.
WarningDo not
Please turn off the product by pressing the power button. Also, unplug the product before inspection, repair or replacement of its components.
- This may cause electric shock or breakdown. Please check the state of the power cord frequently.
WarningDo not
Do not put in and pull out the Power Plug continuously.
- This may cause electric shock or fire.
WarningDo not
Do not modify the original power cord.
- This may cause electric shock or fire.
Installation Guide
WarningDo not
Do not use the product outdoors where the product may get in contact with direct sunlight, rain or snow or places with moisture such as a laundry room or a bathroom.
- This may cause fire or electric shock due to heating and short circuit.
WarningDo not
Do not place it in a bumpy or slanted area. Do not place it on a rug, cushion or vinyl flooring.
- This may cause malfunction, unwanted noise or injury. Please check the state of the product frequently.
WarningDo not
Do not keep or use insecticides, combustible gas, inflammables, or toxic substances near the product.
- This may cause fire or a deformation or malfunction of the product.
WarningDo not
Do not use the product where smell, smoke, or oil is generated such as a restaurant or a barbecue restaurant.
- This may cause a decrease in the performance.
WarningDo not
Do not install the product in a place with excessive oil or smoke for industrial purposes or metallic dust.
- This may cause fire or a malfunction of the product.
WarningCaution
Place the product at least 20inch away from the wall.
- Keep these distances for optimal performance.
WarningCaution
Please check if there is any obstacle around the product to ensure good air circulation.
WarningCaution
Place it at least 80inch away from electronic products such as a TV.
- This may cause a radio interference.
WarningCaution
Open the windows for ventilation before using gas appliances, combustibles and other inflammables.
- There is a risk of explosion or fire.
WarningCaution
Do not use the product to remove toxic gases such as carbon monoxide.
- This may cause a malfunction of the product.
WarningCaution
Do not use the product as a ventilating fan or hoods for gas stove or electric ranges in the kitchen.
- This may cause poor performance of the product and filters.
WarningCaution
Do not install or use the product near a curtain.
- The Pollution Sensor may not work properly.
WarningCaution
Do not use the product for anything other than its intended purpose, e.g. preserving artworks, maintaining precision instruments and animal breeding.
- If you do not do so, it may cause electric shock or fire.
During Use
WarningDo not
Do not put any obstruction around the Air Inlet or the Air Outlet of the product.
- This may cause poor performance, abnormal noise, or malfunction of the product.
WarningDo not
Do not put your finger or any other foreign substances such as a stick into the Air Inlet or the Air Outlet.
- You may get injured by the fan rotating at a high speed.
- This may cause a malfunction of the product.
WarningDo not
If there is abnormal noise, smoke, or small is emitted from the product, first pull out the Power Plug, and then contact our Customer Service Center.
- This may cause fire, burns, or injury.
WarningDo not
Do not inject a toxic substance such as smoke of a cigarette into the porous part on the side of the product, or poke with a sharp object.
- This may cause a malfunction of the product, fire or electric shock.
WarningDo not
Do not put heat of fire near the product.
- This may cause a malfunction or deformation of the product or fire.
WarningDo not
Do not clean the interior of the purifier yourself please contact Customer Service for technical support.
- Otherwise it may cause malfunction of the product or an electric shock.
WarningDo not
Never soak the product in water.
- There is a risk of electric shock.
WarningDo not
Do not sprinkle inflammables such as an insecticide or an air freshener to the Air Inlet.
- This may cause fire or poor performance of the product.
WarningDo not
Do not stand on top of the product or put anything heavy.
- This may cause a malfunction of the product or injury due to fall or damages.
WarningDo not
Please avoid using it near a heating device.
- This may cause fire or electric shock.
WarningDo not
This product should not be used by people including children who lack physical or mental abilities, experience and knowledge to use the product properly without instruction.
- Do not let children play with the product.
- It may cause electric shock or injury.
WarningDo not
Do not turn OFF by pulling the plug.
- This may cause an electric shock or malfunction of the product.
WarningDo not
Do not move the product while it is working.
- This may cause fire or electric shock or partial damage to the product.
WarningDo not
When opening the Filter Cover, please be careful not to let your body or any other foreign material get stuck in the product.
- This may cause an injury or malfunction of the product.
WarningDo not
Be careful of any raised spot or obstruction on the floor when moving the product that may cause a scratch or damage to it.
- Although wheels are mounted on the bottom of the product for its mobility, the product has fairly low floor for its design.
WarningDo not
After cooking, ventilate sufficiently before operating the product to purify air in the room.
WarningDo not
Do not place a bowl with water, drugs, foods, small metallic materials, inflammables, etc. on top of the product.
- If spilled, the products may cause electric shock, fire, or damage.
WarningDo not
Do not clean the product by spraying water or wiping out with benzene, thinner, etc.
WarningDo not
If it's wet, contact our Customer Service Center.
- There is a risk of malfunction or electric shock.
WarningDo not
Wash the Pre-Filter with water on a regular basis and dry it well before use.
- Otherwise it may cause a reduced performance of the product.
- Dry it in the shade.
WarningDo not
Please replace the filters in a timely manner.
- This may cause poor performance of the product.
WarningDo not
Do not push nor lean on the product. It may fall to the ground.
- This may cause an injury or malfunction of the product.
WarningDo not
After cleaning, please make sure to put the parts in their original position.
- Otherwise it may cause malfunction of the product.
WarningDo not
Do not lay the product for use.
- This may cause malfunction of the product.
WarningDo not
Do not put the product near a window or places where the wind of an air conditioner or a heater can reach.
- This may cause malfunction of the sensors.
WarningDo not
When turning off the product, be sure to press the power button to turn product off.
- This may cause product malfunction.
Name of Parts / Accessories
Name of Parts

- 1 Air Outlet
- 2 Control & Display Panel
- 3 Cleanliness Indicator
- 4 Handle
- 5 Fine Dust Sensor
- 6 Filter Case
- 7 Air Purifying Filter
Accessories
-
User Manual
-
Allergen Filter
※The picture may differ from the actual product.
Air Filters
- Pre-Filter
- Allergen Filter
- True HEPA H13 Filter
- Active Carbon Deodorization Filter
※The picture may differ from the actual product.
| Section | Air Filter |
|---|---|
| Level 1 | Pre-Filter |
| Level 2 | Allergen Filter |
| Level 3 | True HEPA H13 Filter |
| Level 4 | Active Carbon Deodorization Filter |
Filter Functions
| Pre-Filter | Filters large dust, hair, pet fur, etc. | |
| Functional Filter | Allergen Filter | Filters allergic substances from the air. |
| Ultra-Deo PM2.5 Filter | True HEPA H13 Filter | Filters mites, pollens, fine dust, and smoke. |
| Active Carbon Deodorization Filter | Filter removes odors, harmful gas, cigarettes, animal fur, NO2. | |
Details to read Before Use
Caution
Caution: When the product is not in use, please unplug the unit.
- This product is exclusively for 120V 60Hz.
- Apply appropriately.
Installation
- Open the Filter Cover.
- Open the Filter Cover from the upper left and upper right side of the unit.
- ※Do not forcefully remove from the bottom of the unit.
- Take out the filter and remove the vinyl wrapping.
- After removing the packaging vinyl, please insert in product.
- Insert the filter with the filter handle facing the opposite direction of the filter insertion.
- Reassemble the Filter Cover onto the product.
- Be careful not to get any of your body or foreign material stuck in the product when reassembling the cover. Otherwise, It may cause injury or malfunction of the unit.
- Connecting the power
- This product is exclusively for 120V. Please connect the product to the appropriate Power Outlet.
- Press the "On/Off" button to operate the unit. Also, Press the "Mode" button to set the desired option.
- ※Make sure the filter is assembled correctly before operating the product.
- Press the "On/Off" button to shut off the unit.
- Once the unit is shut off, allow 10 seconds for the fan to completely shut off.
- All the indicators on the Display Panel will be turned OFF.
Names/Functions of the Control/Display Panel
Control Panel
- ON/OFF : To turn the unit on and off.
- Fan Speed : Adjust the fan speed in manual mode.
※ Each time the button is pressed, the speed setting changes in the order of Level 1, Level 2, Level 3, Level4, Level 5, Level 6, Level 7 and Level 8.
※ To activate the "Button Lock" function hold down the button for 3 seconds or more.
- TURBO PLUS : Select the TURBO PLUS mode.
※ Press this button to turn on Turbo plus mode. To return to the previous mode, press the "TURBO PLUS" button again.
- MODE : Select the desired mode.
※ Each time the button is pressed, the mode changes in the order of SMART, ECO, REPEAT, FINE DUST, BABY, and SLEEP.
- Air Cleanliness Display : Displays current air quality
※ Each time the button is pressed during operation, the corresponding fine dust concentration is displayed. (PM10 → PM2.5 → PM1.0 → PM10 ...)
※ PM10: Fine dust (particle size less than 10㎛)
※ PM2.5: Ultra fine dust (particle size less than 2.5㎛)
※ PM1.0: Super fine dust (particle size is less than 1㎛)
※ This indicator goes on when the button is pressed for three seconds or longer while the unit is in operation and goes off when the button is pressed for another three seconds.
Display Panel
- SMART - This indicates the product is in SMART air purification mode.
- FINE DUST - This indicates the product is in fine dust air purification mode.
- REPEAT - This indicates the product is in repeated air purification mode.
- ECO - This indicates the product is in ECO air purification mode.
- BABY - This indicates the product is in air purification for baby mode.
- SLEEP - This indicates the product is in air purification during sleep mode.
- PM 1.0 / 2.5 / 10 - This indicates the corresponding fine dust concentration level.
- ug/m3 - This indicates the fine dust concentration.
- CHANGE - This indicates when filter needs to be replaced.
- LOCK - This indicates when the Button Lock function is set.
- ON icon - This indicates when the AUTO ON function is set.
- OFF icon - This indicates when the AUTO OFF function is set.
- LEVEL - This indicates operation status, time and step according to mode.
- Voice icon - This indicates the Voice function is on. (voice setting function)
- REFRESH - It comprehensively detects the levels of embodied carbon dioxide (eCO2) and volatile organic compounds (VOCs) indoors and provides an alert for the need of refresh.
- GOOD / NORMAL / BAD - It is lighted to display Good, Normal or Bad depending on the TVOC environment.
- TVOC environment display requires time to stabilize after supplying power or opening and closing the filter door.
- During the stabilization time, it does not display the TVOC environment (Good/Normal/Bad).
Names/Functions of Display Panel & Cleanliness Indicator
Display Panel
- ON/OFF : This indicates operation of the product. It goes off when the product stops operating.
- MODE : Each time this button is pressed, the mode changes in the order of SMART, ECO, REPEAT, FINE DUST, BABY, and SLEEP.
- FAN SPEED : This indicates the manual operation function is on.
- TURBO PLUS : This indicates the product is in TURBO PLUS mode.
- AIR CLEANLINESS : This indicates for five seconds when AIR CLEANLINESS is selected.
Cleanliness Indicator
- Cleanliness Indicator: This displays the cleanliness of the surrounding area with colors.
※ Level of purification is displayed in different colors in each of the 8 stages. (Polluted) Red → Purple → Orange → Yellow → Light Green → Green → Blue-green → Blue (Clean)
※ If you do not operate the product in any way after connecting the Power Plug, no display will show. Press the ON/OFF button to start operating the product.
※ Make sure you hear a beeping noise when pressing the button. The Control & Display Panel may look different from the actual appearance on the product.
※ Different fan speeds may affect the product performance for air purification.
※ When selecting Sleep Mode, the purification display lamp is automatically turned off.
※ When selecting Baby Mode, the purification display lamp is lighted as the baby mood lamp feature.
※ To display air cleanliness, press the AIR CLEANLINESS button for three seconds. The settings are applied until the operation is shut.
※ If multiple air cleaning products are being used in the same room, the ultrafine dust indicator readings may not be accurate.
※ The cleanliness color and the fine dust concentration value may be different to detected air pollution.
※ The color of the purification display lamp is affected by not only fine dust but also volatile gases.
Self Diagnostic Mode / Basic Operation
Self Diagnostic Mode
When the unit is not working properly, the display panel will show an alert. If there is an alert that will not disappear, please contact our customer service center.
Basic Operation
- Insert the plug into a wall outlet.
- The product will enter standby mode with a beeping sound.
- Press the ON/OFF button.
- CN/OFF and SMART icons are lit up on the Display Panel, and the fan starts operating. The 3-digit display shows the current fan speed.
- ※ It runs in the previous operating mode. (Except TURBO PLUS)
- ※ If the Filter Cover is not mounted, an error code will show on the 3-digit display.
- Press MODE to select the desired operating mode.
- Each time the button is pressed, the mode changes in the order of SMART, ECO, REPEAT, FINE DUST, BABY and SLEEP.
- Press FAN SPEED to select the desired fan speed.
- Pressing FAN SPEED changes the operating mode to MANUAL. Each time the button is pressed, the speed setting changes in the order to Level 1, Level 2, Level 3, Level4, Level 5, Level 6, Level 7 and Level 8.
- Press TURBO PLUS to change the operating mode.
- Select this mode to speed up the air purification for the maximum fan speed.
- ※ TURBO PLUS indicator is turned on when this mode is selected.
- ※ To return to the previous operating mode, press the button again.
- Press AIR CLEANLINESS to gauge the ultra-fine dust concentration.
- Each time the button is pressed during operation, the corresponding fine dust concentration is displayed.
- (PM10→PM2.5→PM1.0→PM10 …)
- ※ PM10: Fine dust (particle size less than 10μm)
- ※ PM2.5: Ultra fine dust (particle size less than 2.5μm)
- ※ PM1.0: Super fine dust (particle size is less than 1μm)
- Press AIR CLEANLINESS button for three or longer seconds to select the cleanliness indicator.
- Each time the button is pressed for three or longer seconds, the cleanliness indicator is turned on or off.
- To stop the unit, press the ON/OFF button again.
- All the lights of the Display Panel and the Front Display Panel will be turned OFF, and the product will enter standby mode.
Operating Modes
SMART
SMART mode detects the air quality and will automatically adjust the necessary fan speed.
- In the standby mode, press the ON/OFF button once. Initially, the unit will run in SMART mode. If a different mode was selected it will maintain your selected operating mode.
- It senses the air quality and adjusts the fan speed.
- Shows current fan speed and cleanliness of air during the operation.
- Press the AIR CLEANLINESS button for at least three seconds to activate or deactivate the cleanliness indicator.
ECO
Mode in which the air is maintained in a clean state and energy is efficiently controlled.
- It enters when pressing the Mode button once in SMART mode.
- This mode runs while minimizing energy consumption and controls the fan operation depending on the level of purification and surrounding brightness.
- If the indoor air is maintained in a clean state for a specific period, all LEDs except "Eco" are turned off.
- The purification display lamp may be turned on or off depending on the settings.
※ The control and display panel may appear different than the image above.
REPEAT
Mode in which it runs and stops on its own according to the set time.
- It enters when pressing the Mode button twice in SMART mode.
- Press the Turbo Plus button for over 3 seconds to set the Repeat Operation time (it is possible to set between 1 to 12 hours in 1-hour steps).
- It runs and stops repeatedly for the set time (the initial value is 12 hours).
- The operation is identical to Smart Air Purification.
- The purification display lamp may be turned on or off depending on the settings.
FINE DUST
Is a setting that automatically adjusts to eliminate fine dust.
- In SMART mode, press the MODE button three times.
- It auto controls the fan speed using the preset algorithm.
- It shows the current fan speed and cleanliness of air during operation.
- The purification display lamp may be turned on or off depending on the settings.
※ The control and display panel may appear differently than the image above.
BABY
Mode for babies with minimal noise and baby mood lamp feature.
- It enters when pressing the Mode button 4 times in SMART mode.
- It minimizes the air volume and activates the baby mood lamp to help babies get healthy sleep.
- When selecting the mode, the baby mood lamp is lighted.
- The baby mood lamp may be turned on or off depending on the settings.
SLEEP
Operation mode minimizing air volume and display.
- It enters when pressing the Mode button 5 times in SMART mode.
- It minimizes the air volume and runs quiet air purification for sound sleep.
- When selecting the mode, the purification display lamp is turned off.
- The purification display lamp may be turned on or off depending on the settings.
※ The control and display panel may appear differently than the image above.
ENERGY SAVE
Detects indoor lighting and adjusts accordingly
- When the Energy Eye Night Sensor senses darkness during operation, all indicators including the cleanliness indicator are turned off, and the Power Saving option is turned on.
- Power saving is activated when light is detected. Manual activation is also available.
※ Please refer to Other Settings for how to set the Energy Eye function.
MANUAL
Mode that operates by selecting the desired fan strength
- Press the FAN SPEED.
- Press the FAN SPEED button to set the desired wind speed (1-speed to 8-speed).
- The FAN SPEED is displayed.
- The purification display lamp may be turned on or off depending on the settings.
TURBO PLUS
Quickly remove dust with maximum performance.
- Press the TURBO PLUS button to activate.
- The fan will speed up to the maximum speed to purify the air.
- The purification display lamp may be turned on or off depending on the settings.
- The operation time of the Turbo Plus mode may be changed through settings so please refer to Other Settings (p. 26).
※ The control and display panel may appear differently than the image above.
Operation Status by Modes
AIR CLEANLINESS
• See the status of the air quality by pressing AIR CLEANLINESS button during operation.
| Pollution Level | Level 1 (Clean) | Level 2 | Level 3 | Level 4 | Level 5 | Level 6 | Level 7 | Level 8 (Pollution) |
|---|---|---|---|---|---|---|---|---|
| Air cleanliness Indicator | Blue | Blue Green | Green | Light Green | Yellow | Orange | Purple | Red |
※ When different products are used in the same room, the air cleanliness and pollution level may differ due to the air flow.
AUTO OFF
- When pressing the Turbo Plus button for over 3 seconds during an operation, it enters the Auto Off time settings page.
- The time increases by 1 hour every time the Turbo Plus button is pressed, and it is possible to set up to 12 hours.
- It automatically stops after operating as much as the set time.
※ The control and display panel may appear differently than the image above.
AUTO ON
- When pressing the Turbo Plus button for over 3 seconds in the Operation Standby state, it enters the Auto On time settings page.
- The time increases by 1 hour every time the Turbo Plus button is pressed, and it is possible to set up to 12 hours.
- Automatically starts running after the set time. (Initially, it runs in the SMART mode. If a different mode was set previously, it runs in the last set mode.)
BUTTON LOCK
- This function is used to prevent malfunction during cleaning or due to contact by children.
- Press the Fan Speed button for 3 seconds to set or deactivate the Button Locking.
Filter Replacement / Filter Clean Alert
- Alert for filter replacement or filter cleaning will appear. Once the filters are replaced, reset the alarm for filter replacement.
- Once the time for replacement or cleaning of the filter arrives, the purification display lamp may flicker.
- If the purification display lamp flickers, clean or replace the filter.
- The filter replacement and cleaning cycle may vary depending on the surrounding environment.
※ The control and display panel may appear differently than the image above.
REFRESH
- It comprehensively detects the levels of embodied carbon dioxide (eCO2) and total volatile organic compounds (TVOCs) and provides an alert for the need of ventilation.
- If the "Ventilation" LED is lighted, allow fresh air to enter the indoors by ventilation.
- The ventilation alert display requires stabilization time after supplying power.
- During the stabilization time, the "Ventilation" LED is not lighted.
TVOC ENVIRONMENT
- It comprehensively detects the level of total volatile organic compounds (TVOCs) that exist indoors to display in 3 different stages: "Good, Normal or Bad".
- Total volatile organic compounds (TVOCs) refer to gases or odor, which are generated from paints, construction materials or cleaning supplies, that may be hazardous to human body.
- The TVOC environment display (Good/Normal/Bad) requires stabilization time after supplying power.
- During the stabilization time, the TVOC environment (Good/Normal/Bad) is not indicated.
※The control and display panel may appear differently than the image above.
Other Settings
How to Choose LANGUAGE
The guide voice can be set in English, Spanish, Korean or Chinese. The default language is English.
- Insert the plug to a wall outlet and in the standby mode with all indicators off, press the MODE button for three seconds or longer.(If the purifier is running, press the ON/OFF button to stop it.)
- "En" is displayed on the control panel as shown in the picture below.
- Press the FAN SPEED button to select En for English, ES for Spanish, kr for Korean or cn for Chinese.
- Press the ON/OFF button to save the setting.
- ※ The setting is automatically canceled if left idle for 20 seconds or longer.
How to Adjust Voice Volume
The following instructions explains how to cancel the voice option and adjust the volume.
- Begin in Standby Mode.
- Press the MODE button for three seconds or longer to enter the function setting mode and then presss the MODE button once again.
- "3" is displayed on the control panel as shown in the picture below.
- Adjust the volume by pressing the FAN SPEED button.
- (OFF setting: Silent / Level 0: BEEP output without voice / Level 1: Small voice / Level 5: Large voice)
- Press the ON/OFF button to save the setting.
- ※ The setting is automatically canceled if it's left idle for 20 seconds or longer.
※ The control and display panel may appear differently than the image above.
How to Set Filter Replacement Alarm
The following instructions show how to set and cancel the alarm for filter replacement.
- Begin in Standby Mode.
- Press the MODE button for three seconds or longer to enter the function setting mode and then press the MODE button two times.
- "On" and "Replace the Filters" are displayed on the control panel as shown in the picture below.
- Press the FAN SPEED button to activate or deactivate this option.
- ※ It will not emit sound for filter replacement when it is deactivated.
- Press the ON/OFF button to save the setting.
- ※ The setting is automatically canceled if it's left idle for 20 seconds or longer.
How to Set Sensor Sensitivity
Sensor sensitivity can be set to Low, Medium or High. The default level is set to Medium.
- Begin in Standby Mode.
- Press the MODE button for three seconds or longer to enter the function setting mode and then press the MODE button three times.
- "2" is displayed on the control panel as shown in the picture below.
- Press the FAN SPEED button to set the level to 1, 2 or 3.
- ※ Level 1 : sets the Sensor sensitivity to Low. ※ Level 2 : sets the Sensor sensitivity to Medium.
- ※ Level 3 : sets the Sensor sensitivity to High. ※ The fine dust is detected well as you set the higher level.
- Press the ON/OFF button to save the setting.
- ※ The setting is automatically canceled if it's left idle for 20 seconds or longer.
※ The control and display panel may appear differently than the image above.
How to Set Screen Saver
This function allows you to save energy by adjusting brightness of the screen.
- Begin is Standby Mode.
- Press the MODE button for three seconds or longer to enter the function setting mode and then press the MODE button four times.
- "On" is displayed on the control panel as shown in the picture below. Press the FAN SPEED button to set this option on or off.
- ※ The light will stay illuminated even if it is turned off.
- Press the ON/OFF button to save the setting.
- ※ The setting is automatically canceled if it's left idle for 20 seconds or longer.
How to Set Energy Eye Function
The following instructions show how to set the darkness sensing range for power saving.
- Begin with Standby Mode.
- Press the MODE button for three seconds or longer to enter the function setting mode and then press the MODE button five times.
- "2" is displayed on the control panel as shown in the picture below.
- Adjust the level from OFF to 3 by pressing the FAN SPEED button.
- ※ The higher the setting, the better the entry into the power saving mode. (OFF: Set this level when you do not wish to use this function)
- Press the ON/OFF button to save the setting.
- ※ The setting is automatically canceled if it's left idle for 20 seconds or longer.
※ The control and display panel may appear differently than the image above.
How to set the time for TURBO PLUS Mode
This is the setting method for the TURBO PLUS operation time. It can be set to run continuously for 10 mins, 20 mins, 30 mins, 40 mins, 50 mins and non-stop.
- Begin at Standby Mode.
- Press the MODE button for three seconds or longer to enter the function setting mode and then press the MODE button six times.
- "[ ]" is displayed on the control panel as shown in the picture below.
- Press the FAN SPEED button to set the time to 10 mins, 20 mins, 30 mins, 40 mins, 50 mins and non-stop ("[ ]").
- (When set to 10 mins, it returns to the previous mode after 10 mins of TURBO PLUS operation.)
- Press the ON/OFF button to save the setting.
- ※ The setting is automatically canceled if it's left idle for 20 seconds or longer.
How to Maximize wind strength in Auto mode
Setting the maximum wind strength in smart, eco, and repeat mode.
- Begin on Standby Mode.
- Press the MODE button for three seconds or longer to enter the function setting mode and then press the MODE button seven times.
- "OF" is displayed on the control panel as shown in the picture below.
- Press the Fan Speed button to set the auto mode maximum wind strength (OF / On).
- (When set to On, it operates stronger wind in smart, eco, and repeated operation mode.)
- Press the ON/OFF button to save the setting.
- (The setting is automatically canceled if it's left idle for 20 seconds or longer.)
※ The control and display panel may appear differently than the image above.
Cleaning and Maintenance Guide
How to Clean the Fine Dust Sensor (Clean once every one to two months)
- Open the filter cover on the side without the logo.
- Open the fine dust sensor cover.
- Before next step, clean them with a soft brush or vacuum cleaner.
- Carefully wipe the sensor lens with a cotton swab.
- ※ If not cleaned regularly, unit may not perform at it's optimal level.
- ※ Cleaning cycle varies depending on the environment, it requires more frequent cleaning if used in a dusty area.
※ Except water, do not use any volatile substances including alcohol and acetone to clean the sensor.
※ If the sensor lens are covered with dust, the pollution indicator may show "Polluted" and not change. In this case, thoroughly clean the sensor again.
How to Clean the Main Body (Clean once every two to four weeks.)
- Wipe the product with a soft cloth dampened with lukewarm water and squeezed thoroughly.
- Use a cotton swab when cleaning the dust off the exterior grooves.
- ※ Do not use an alkaline detergent when cleaning the control & display panel.
- ※ Do not use a sulfuric acid, hydrochloric acid or organic solvent including thinner and kerosene for cleaning the surface of the product. Do not attach any sticker on the surface. It may cause damage to the surface.
How to Clean the Air Outlet (Clean once every two to four weeks.)
- Turn the grill on top of the product as shown.
- Hold your finger on the grill and pull it out as shown.
- Clean the grill with a soft brush or a vacuum cleaner.
- Use a soft brush or vacuum cleaner to clean the dust off the air vent.
※ The cleaning cycle varies depending on the environment.
How to Clean the Pre-Filter (Clean once every two to four weeks.)
- The Pre-Filter can be reused after the dust is removed or washed in water.
- The Allergen Filter, True HEPA H13 Filter, Active Carbon Deodorization Filter CANNOT be reused even after cleaning.
- If the cleaning LED lights up, clean the Pre-Filter.
- The filter cleaning cycle may vary depending on the surrounding environment.
- Open the Filter Cover.
- Open the Filter Cover by pulling the upper part of each side of the Filter Cover.
- ※ Gently remove the cover by starting at the top of the cover.
- Remove the dust attached to the Filter Cover surface lightly with soft, dry cloth or soft brush.
- Remove the Ultra-Deo PM 2.5 Filter from the product and remove the dust on the surface using a vacuum cleaner.
- Clean the Pre-Filter attached to the Ultra-Deo PM 2.5 Filter by removing the dust or remove the Pre-Filter and wash with lukewarm water.
- Wash the removed filter in water and dry it out away from sunlight.
- ※ If wet, it may cause a malfunction or odor.
Caution
※ If you wash it with hot water or dry it under direct sunlight, the filter may become deformed.
- Attach the Pre-Filter to the Ultra-Deo Pm 2.5 Filter. After attaching to the product, reinstall the filter cover.
How To Replace the Filters
Video Tutorial
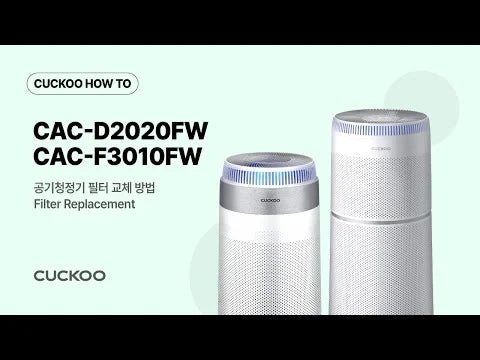
- If the Filter replacement LED lights up, please replace the filter.
- Always unplug the power cord before replacing a filter.
- If the filter is used over the cleaning or replacement cycle, it may degrade the performance or emit odor.
- Please use genuine CUCKOO filters only.
- A torn or wet Air Purifying Filter must be replaced with a new one. Contact our Customer Service Center to purchase filters.
Filter Cleaning and Replacement Cycle
| Filter | Cleaning / Replacement | Note | |
|---|---|---|---|
| Pre-Filter | Once / 2–4 weeks | Cleaning & Washing | |
| Functional Filter | Allergen Filter | Once / 4 months | Replacement |
| Ultra-Deo PM 2.5 Filter | Once / 12 months | Replacement | |
※ Filter replacement cycle may differ depending on the environment and time of use.
※ The life test of Ultra PM 2.5 Filter and Deodorizing Filter is done by JEMA1467 (Air cleaners of household and similar use) evaluated the life span by burning tobacco.
How to Replace the Air Purifying Filter
Please check before asking for Support.
▼ If you do not comply with this user manual, the device may not work properly. Please read the following measures accordingly if there is a problem with the product. If there is still a problem, please contact our Customer Service Center.
| Problem | Checklist | Recommendation |
|---|---|---|
| The product won't work even if I press the Power button. | • Is the power cord plugged into the power outlet? | • Put the Power Plug in a Power Outlet of 120V, 60Hz. |
| • Is there a black out? | • Use the product after electricity is supplied. | |
| • Is the product properly assembled? | • Assemble the product properly. | |
| • Have you pressed the ON/OFF button? | • Press the ON/OFF button. | |
| The volume won't change. | • Is the product in the MANUAL mode? | • Choose your preferred mode. |
| • Is the product in the SLEEP or BABY mode? | • In Sleep or Baby mode, the air volume is fixated to be the minimum air volume. | |
| The air does not seem to be purified. | • Is the indoor air overly polluted? | • Ventilate the room and then use the product. |
| • Is the room too large? | • Use the product in an area not exceeding its coverage limit. (Avoid placing the device where it is well ventilated like a near door or window.) | |
| • Is there any obstacle around the product? | • Remove any objects surrounding the unit. | |
| • Is the product installed where wind cannot move freely? | • Install the product elsewhere. | |
| • Has the time for filter cleaning and replacement passed? | • Check the Filter cleaning and replacement cycle and clean or replace the Filters. | |
| There is an odor coming from the air vent. | • Did the odor get released in the initial use of the product not long after purchase? | • The odor is an activated carbon. The odor will disappear in one to two weeks after the product starts operation. It is a smell of an activated carbon (charcoal) which is harmless to the human body. |
| • Do you use the product in a place with a lot of smoke or smell? | • The performance of the unit may decrease if there is excessive smoke. Please air out the room before using the product. | |
| • Has the time for filter cleaning and replacement passed? | • Check the Filter cleaning and replacement cycle and clean or replace the filters. | |
| The color of the air purification status display is always the same. | • Is there dust on the Lens of the Dust Sensor? | • Clean the lens of the dust sensor. |
| • Does the dust pollution status continue on low or high? | • Set the sensor sensitivity to Level 1 (Low) or Level 3 (High). | |
| The TVOC environment display continues to indicate the "Bad" state. | • Isn't the indoors severely polluted or have you not conducted any ventilation? | • Please ventilate the space and remove the power plug before re-supplying power and use it again. |
| When other functional defects occur | • Diagnose the problem, unplug the power cord and contact our Customer Service Center. |
Product Specifications
| Category | |
|---|---|
| Category | Air Purifier |
| Model name | CAC-F3010FW |
| Rated Voltage and Current | 120V, 60Hz |
| Rated Power Consumption | 85W(1.5A) |
| Insulation Rating | Type 2 device |
| Dust Collecting Method | Mechanical dust collecting method |
| Safety Device | Power will be deactivated when the door is being opened or closed. |
| Place for Use | For indoors |
| Effective Reach Area | 1094sqft(101.6m²) |
| Product Size | 16.1" x 16.1" x 35.2" |
| Product Weight | 30.86 lb |
※The information (exterior, design, and specifications) provided in this User Manual is subject to change.
※This appliance is intended for home use (Class B) and is suitable for home use. It can be used in all areas.
Inquiry about Malfunction
Product parts may wear out due to heat, moisture, dust over time, which in turn may cause malfunction of the product.
In the case that
❶ 'Check before reporting a malfunction'
❷ You can feel electricity when you touch the product with your hands
❸ The power is supplied, but the Motor does not work
❹ Other malfunctions occur
Please stop using the product.
Please unplug the product and visit www.cuckocrental.com for customer service.
CUCKOO
We provide satisfying consultation and services concerning your complaints, suggestions, and recommendations upon receiving your troubled product model name, status, and contact information.
- After reading this manual, keep it in a place easily accessible to the user for future reference.
- This manual includes the warranty.
- Caution : Please read this manual carefully to ensure safety and a longer product lifespan.